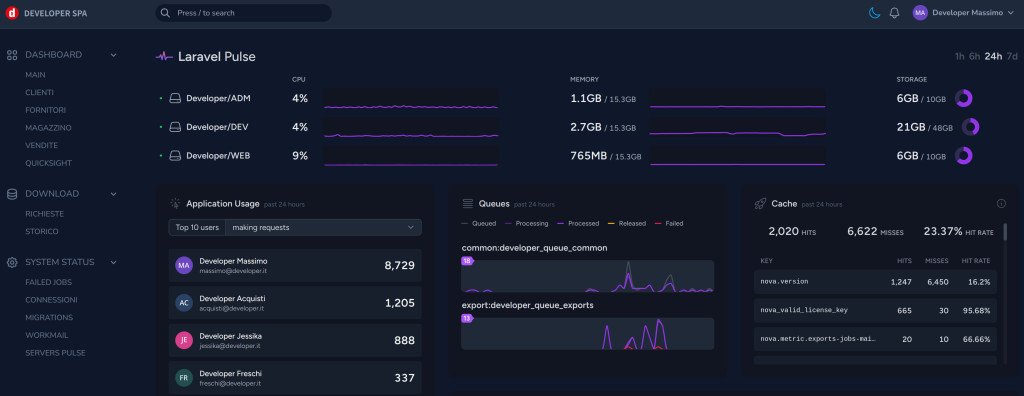
Although Laravel Pulse provides an endpoint that can be accessed through a simple link to use the Pulse dashboard as a standalone application, I needed to integrate the view directly into the Laravel dashboard to create a better user experience.
Objective
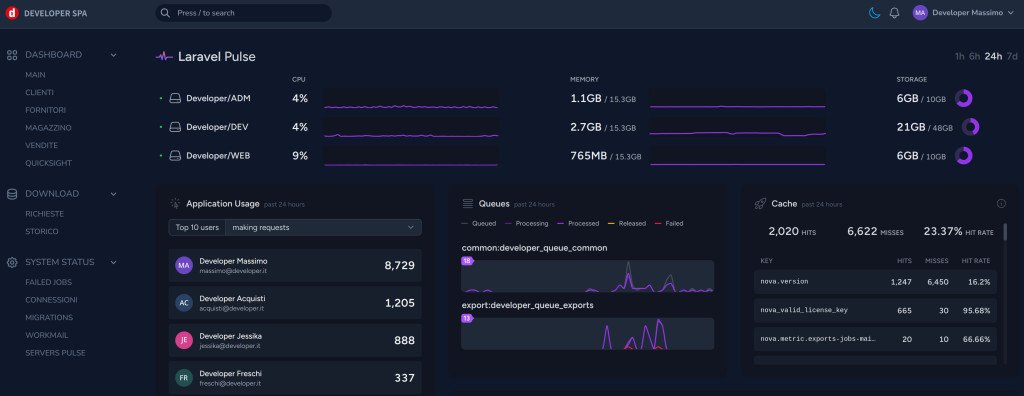
Here I present the result we will achieve with this integration. In the standard version, I encountered the following issues: when the dark mode was activated in Laravel Nova, it also had to be selected in Pulse, or vice versa. Additionally, with a menu available in Laravel Nova for the status of various applications, every time the Pulse dashboard was accessed, it was necessary to go back to choose another option.

The idea is to create a custom route in Laravel Nova that generates an iframe element for a modified version of the Pulse dashboard, without using the original endpoint. This way, we can customize the original layout, integrate a single dark/light theme state, and personalize the CSS.
Creating Custom Routes
First, we create a file for defining the routes or modify the existing one if you already have custom routes. I created a file in app/Nova/Routes/tools.php.
Route::get('status/pulse')
    ->uses('App\Nova\Controllers\Tools\Status\PulseController@index')
    ->name('tools.status.pulse');

Route::get('status/pulse/iframe')
    ->uses('App\Nova\Controllers\Tools\Status\PulseController@iframe')
    ->name('tools.status.pulse.iframe');
I created a route for the main Laravel Nova page and another to embed a modified copy of the Laravel Pulse dashboard via an iframe, tailored to our needs. Later, we will also define the controller to execute these two functions. Of course, you can change the path value according to your preferences.
Creating the Controller
Personally, I prefer to keep the entire Nova environment in the app\Nova directory and leave the standard directories for the operational functions of the application. Therefore, I create the necessary controller in the app/Nova/Controllers/Tools/Status directory as indicated in the route definition.
namespace App\Nova\Controllers\Tools\Status;

use App\Http\Controllers\Controller;

class PulseController extends Controller
{
    /**
     * Application nova function
     */
    public function index()
    {
        return inertia('StatusPulse');
    }

    /**
     * Application nova function
     */
    public function iframe()
    {
        return view('admin::tools.status.pulse.index');
    }
}
The first method is used to render the main page through a Vue component, as Nova performs the initial rendering on the client side. On the other hand, the "iframe" method will be processed server-side, rendering a Blade view with the original copy of the Laravel Pulse dashboard.
Creating the Vue Component
To make the /status/pulse path work within the Laravel Nova path, we need to create a Vue component, implement a JavaScript file, and load it during the initialization of Laravel Nova. For example, I use this technique to also load Livewire, which I use alongside Nova.
import StatusPulse from './pages/Status/Pulse.vue'

Nova.booting((app, store) => {
    Nova.inertia('StatusPulse', StatusPulse)
})
Let's create a nova.js file in the environment where you manage asset creation. I use ViteJS, but I'm sure you can implement it with other tools as well. In the same directory as nova.js, we create a directory with the "vue" template at ./pages/Status/Pulse.vue using the following code.
<template>
  <div>
    <iframe src="/nova/status/pulse/iframe?period=24_hours"
            width="100%" style="min-height:100vw"></iframe>
  </div>
</template>
Creating the Blade View
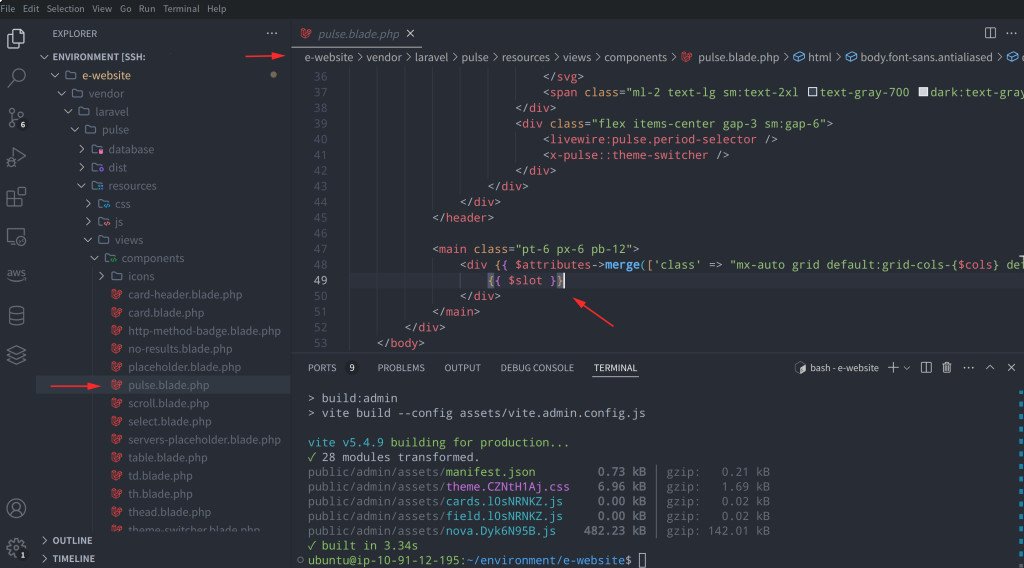
Now the environment should be ready to display a page that renders the Blade view associated with the previously defined controller via the "iframe" method. For now, simply copy the file from the Laravel Pulse package located at app\vendor\laravel\pulse\resources into your Blade view, just to test its functionality (we will do the customizations later).

Pay attention to the {{slot}} variable, which needs to be replaced with the list of Laravel Pulse widgets we want to display in our dashboard. Therefore, we should modify the code as follows:
<main class="py-4">
  <div {{ $attributes->merge(['class' => "mx-auto grid default:grid-cols-{$cols} default:gap-6"]) }}>
    <livewire:pulse.servers cols="full"/>
    <livewire:pulse.usage cols="4" rows="2" />
    <livewire:pulse.queues cols="4" />
    <livewire:pulse.cache cols="4" />
    <livewire:pulse.slow-queries cols="8" />
    <livewire:pulse.exceptions cols="6" />
    <livewire:pulse.slow-requests cols="6" />
    <livewire:pulse.slow-jobs cols="6" />
    <livewire:pulse.slow-outgoing-requests cols="6" />
  </div>
</main>
Now we are ready to run a test. If the dashboard is displayed without any issues, we can move on to the code customization phase. Otherwise, carefully repeat the previous steps. In this demonstration, I am using the original code my implementation, so it should be quite reliable in terms of functionality.
Dashboard Customization
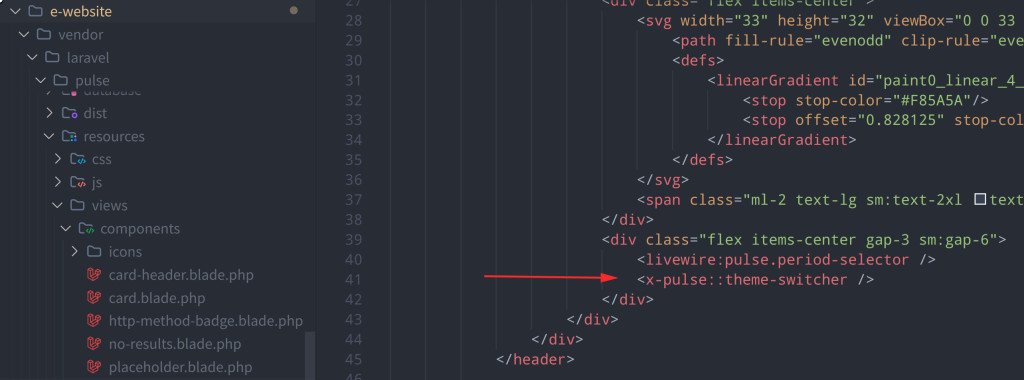
To make the Pulse page more consistent, we need to make a few adjustments. The first is to remove the theme-switcher component from the copied code and replace the theme switching based on the one set in Laravel Nova. So, the first step is to remove the switch line.

Remove the indicated component from the code we previously copied into our Blade view, and add a JavaScript snippet in the HEAD section to enable or disable the dark theme based on the theme state of Laravel Nova, which in this case acts as a container.
@livewireScriptConfig

<script>

  function updateTheme() {
    if (window.parent.document.documentElement.classList.contains('dark')) {
      this.theme = 'dark'
      localStorage.theme = 'dark'
      document.documentElement.classList.add('dark')
    } else {
      this.theme = 'light'
      localStorage.theme = 'light'
      document.documentElement.classList.remove('dark')
    }
  }

  const observer = new MutationObserver(function(mutationsList) {
    for (let mutation of mutationsList) {
      if (mutation.attributeName === 'class') {
        updateTheme();
      }
    }
  });

  observer.observe(window.parent.document.documentElement, {
    attributes: true
  });

  updateTheme();

</script>
Insert this code right after the @livewireScriptConfig instruction that I indicate as a reference. At this point, we should have achieved the Pulse theme switch by using the Laravel Nova theme switch. In addition to customizing the JavaScript, we can also modify the CSS to better suit our environment or any customizations made in the Laravel Nova environment.
<style>
  html.dark .dark\:bg-gray-900
  {
    background-color: #101521 !important;
  }
  *, :before, :after {
     --tw-gradient-to-position: 0;
  }
</style>
For example, I changed the background color in the "dark-mode" version to make it more visible compared to the default background of Laravel Nova. I also removed some backgrounds related to the header section to achieve a more seamless integration with the Laravel Nova theme.
Final Result

I hope this experience proves useful for your work. See you in the next post. Any improvements to the solution are welcome; feel free to use the comments to reach out to me. Thank you!


